Showing posts with label fabric. Show all posts

Wednesday, January 21, 2015

In my Studio: Valentines Envelope Tutorial


Last year I made these really cute valentines envelopes, they were a huge hit with everyone. My sons teacher told me the other day how she has been using hers to store jewelry when she's travelling. I thought it would be fun to repost the tutorial in time for this years February the 14th.

Materials
  • Felt pieces
  • Embroidery thread and needle
  • Button
  • Iron-on printer sheet
  • Ribbon
  • Template (as photo below)

1) Write a list of all the names you would like on your envelopes and print them out onto iron-on printer paper. I used the font 'courier' to make it look like old-fashioned typewriter print. Remember to flip your page first before printing it so that the names come out the right way around. I did this my saving my word document as a PDF then opening it up in photoshop and flipping it before printing it out.


2) Cut out the names and iron them onto a grosgrain ribbon, cut the ribbon either side of the name leaving a small amount to turn under on both the open fraying sides.


3) Use your template to cut out your felt pieces, also cut out small felt hearts in coordinating colors.


4) Sew the hearts and the names on to the envelopes in the corresponding places (see photo below.) Tuck the raw edge of the ribbon under so that it won't fray.


5) Turn over the envelopes and sew the sides and the end down.


6) Sew a button on the back and cut a small eyelet in the flap.

7) Fill the envelop with a valentines card, gift, candy or a perfect Valentines day surprise.


All you need is love. But a little chocolate now and then doesn't hurt. Charles M Schultz


Good Luck and Good Making!

Sarah Omura
So Handmade

Thursday, January 8, 2015

In My Studio- Using up Scraps


After a busy holiday season January is the perfect time for me to have a big sort out of my supplies. One area that threatens to take over is my remnant stash, one scrap of fabric seems to multiple overnight and becomes an overflowing colorful hoard.
Each small scrap seems so precious to me, knowing its origins and its possibilities. I endeavor to try and use up all my scraps not only because I love all of these fabrics and can't bare to throw them away but in an effort to save money, to do a small bit for the environment and because I want to breath new life into these redundant offspring.
January seems like a perfect month to use up the scraps, maximize my existing supplies, organize my remnant stash and get creative with the possibilities.
Here are some ideas for projects to get crafty with your own scraps:
Butterfly Hair Barrettes


Monster Tooth Fairy Pillows


Flower Brooches

Flower Birthday Cards


Heart decorations


"I'm a little bit of a fabric lunatic" John Malkovich


Good Luck and Good Making!


Sarah Omura


Monday, December 15, 2014

In My Studio: Plastic Bag Dispenser Tutorial


In an effort to save some money this holiday season I decided to make all my sons teachers one of these plastic bag dispensers as a 'green' Christmas present. They are quick and easy to make and useful for every household. Here is a tutorial to make your own for gifts or just for yourself!
Materials
Three different fabrics in coordinating colors.
One piece of thin elastic 16" long
1) Cut the top piece of fabric A into a rectangle 15" by 18"
2) Cut the middle piece of fabric B into a rectangle 15" by 5"
3) Cut the bottom piece of fabric C into a rectangle 15" by 6"
4) Cut a strip of any of the fabrics (piece D) 2" by 10"

4) Fold over 1/4 " and iron fabric C (along the 15" side).

5) Fold over, iron and pin fabric C again, leaving a hem of half an inch.
6) On the sewing machine hem along this edge.

7) Fold over twice and iron the top of fabric A and sew it down (along the 15" side).


 8) Pin and sew the fabric piece B to the un-hemmed bottom of piece A, right sides together.


9) Pin and sew the fabric piece C onto the bottom of the piece you just sewed, right sides together.


10) Iron the seams open on the reverse side.


11) Take your strip piece D and fold in half along the long edge, right sides together and iron. Sew down the long side and then turn inside out to make the long 'handle'. Over stitch along both edges.


12) Mark the center at the top of the main fabric piece and mark 3 1/2" either side of this center point.


13) Pin the tie at these points to the inside of the main fabric making a loop


14) Sew these down.


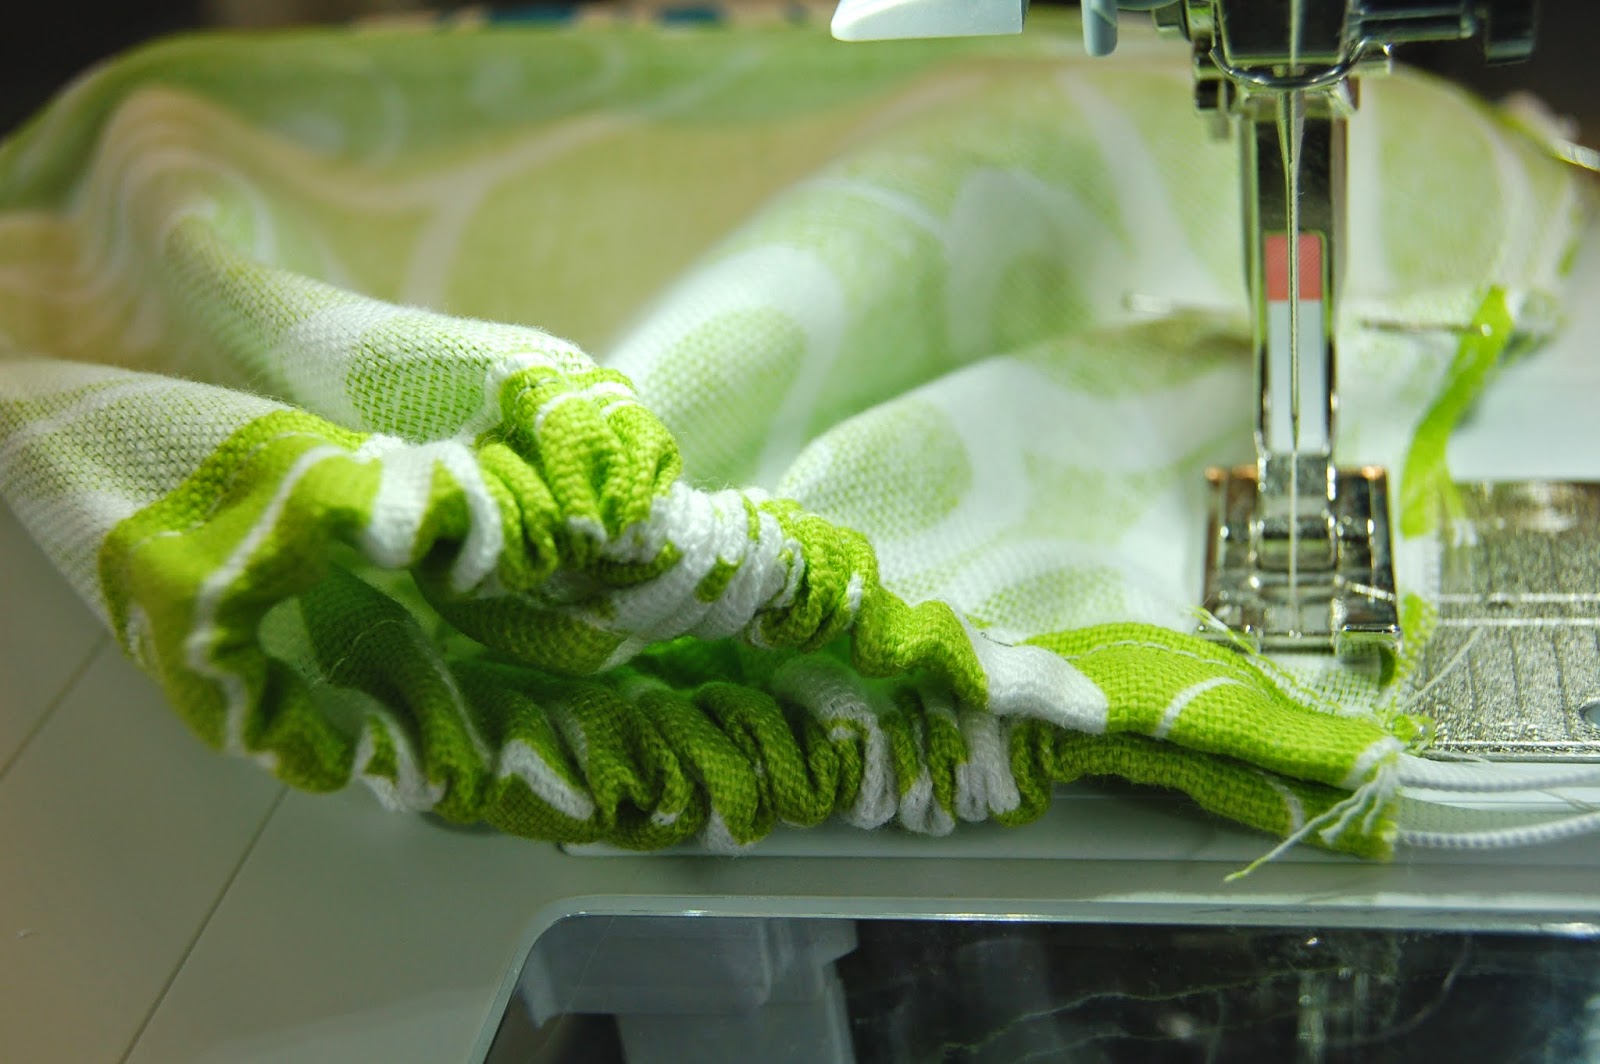
15) Take the piece of elastic and attach a safety pin to one end. Thread this through the bottom hem and leave hanging out of both ends.


16) Fold along the middle and pin down the sides (right sides together)


17) Sew down this edge from the top. When you get to the bottom pull the elastic tight (as shown) and continue to sew over the elastic ends. Reverse to make it extra strong

18) Trim the excess of elastic and turn inside out.

19) Hang up and stuff with bags!


Less then 1% of all plastic bags in the US are recycled- help change this frightening statistic


Good Luck and Good Making!


Sarah Omura


Monday, September 8, 2014

In My Studio: Getting ready for the Holiday Season


Yes I know its only the beginning of September but right now my studio looks like the Christmas Fairy has taken up residence!
This is the prime time of year to get prepared for the busy holiday season. My little boy is going back to school and after a wonderful summer - with very little work happening- it's time to get back to the grindstone and get making. My busy selling period on Etsy is the time from mid October through till mid December and getting ready for this is crucial.
In order to prepare for a busy holiday season of craft fairs and Etsy sales here are some tips to make the next few months the most successful.


1. It goes without saying to ensure that you have enough product to sell. Do a stock take of your current inventory.


2. Look at your sales for the same period last year. What sold well and what didn't.

3. Look at what craft fairs you are doing and what products do best in these locations.

4. Write a list and prioritize your making paying attention to the items that sold well and leaving out those that didn't.

5. Stock up on materials you will need to complete all the products in your list.

6. If you make a lot of holiday products buying in the sales after last years holidays can save a lot of money, otherwise lots of online stores sell Christmas craft supplies all year around.

7. If you sell on Etsy during this period make sure you have all the packaging materials you will need such as boxes, tissue paper, business cards and labels.

8. Once you have your products ready take your photographs well ahead of time and work on your Etsy pages.


I was looking back at some of my previous blogs and felt these might also be useful to mention:
In My Studio: Craft Fair Preparations tips on preparing for the many holiday craft fairs coming up.
and if like me you are juggling many hats here are some tips on ways to save time throughout a busy day. In My Studio: Time Saving Tips

"Give me six hours to chop down a tree and I will spend the first four sharpening the axe" Abraham Lincoln
Good Luck and Good Making!
Sarah Omura

Tuesday, September 3, 2013

In My Studio: Babies, Babies, Babies!

Murasaki Cloth Doll by Kokma
As I enter the final stages of my pregnancy I am drawn to the gorgeous array of baby merchandise in the stores, in magazines and online. Everywhere I look I see cute embroidered owls, wonderfully colored nursery prints, and irresistible stuffed animals.

Trying not to spend a fortune I decided to try and make some of these items myself. I have so far I have managed 3 different projects:

1) I recovered an old glider chair I found in a consignment store. I bought the chair for $15 but then spent over twice that amount on the fabric! I chose an indoor/ outdoor weight grey and yellow print that I pre-washed to save any shrinkage when I inevitably have to launder the cushions. I replaced some of the foam inside as this had deteriorated and made all the cushions with velcro fastenings to be able to take out the foam easily for cleaning.

Before                                                                      After

Diaper changing pad

2) Changing Pad: I made some diaper changing pads to carry around in our diaper bag for use when out and about. I found this great monkey laminated fabric on www.fabric.com and backed it with a coordinating quilted fabric for extra comfort. I then made a tie that attaches with Velcro.


Nursing Cover

3) Nursing Cover: I made myself a nursing cover out of this fun floral print with coordinating dot and also made a small bag for it to be stowed away in. There are many free downloadable patterns and tutorials available online and I found a really easy to follow one at:

www.craftaholicsanonymous.net/nursing-cover-pattern-with-pocket.

With the ever growing market for baby items I wonder if there could be a new line in my own store So Handmade for baby things, that's if I ever get the time in between feeding, laundry and catching up on zzzz's!

“Babies are such a nice way to start people - Don Herold

Good Luck and Good Making
Sarah Omura - So Handmade