Showing posts with label fantasy. Show all posts

Monday, October 20, 2014

Imaginative Realism


Jeff Jones
Imaginative Realism is the new name for fantasy art.  That covers all the genres of science fiction, fantasy, horror and gaming art that took realistic painting or sculpture in the direction of things only seen in the imagination.  I do crafts, but my main employment has been as an artist working in the publishing industry, making paintings that will grace the covers of fantasy books.  

In September I was lucky to attend Illuxcon7, the premier convention for Imaginative Realism, created by Patrick and Jeannie Wilshire.  The Allentown Museum of Art is inundated every September with artists, collectors, and students of the fantastic from all over the world.  Only non-digital work is allowed, so the galleries are filled with the most amazing work in traditional methods - oils, watercolors, graphite, and the three dimensional work is beyond description, especially because I haven't the faintest idea what they are using to create their strange and lifelike beings.  There are also wonderful classes and discussions going on in the nearby Baum Education Center, and a stream of students getting their portfolios reviewed by professionals.

Allentown Museum of Art

Here are some of the artists I met and the work that I saw at Illuxcon7.

Stephen Hickman


John Jude Palencar
Bob Eggleton

Marianne Plumridge

Bob Eggleton & Marianne Plumridge

Richard Hescox

Annie Stegg

Travis Lewis

Rebecca Guay

My art display
Mermaid: Blue Eyes


I only have photos of a small part of the show, but more and larger views of the artists' work can be seen at:

http://www.illuxcon.com/#

Illuxcon is thoroughly inspiring for me.  I love seeing work this good, and find it gets the creative juices flowing in ways that just working alone does not.  It's a pleasure to meet the artists, the collectors, and the fans in an intimate and low key setting.  We all wander around talking and chatting and having a great time.  We also sell some art, which is always good too.


Jody


a Studio by the Sea

Wednesday, April 24, 2013

DIY: Matting & Framing Art


DIY: Matting & Framing My Fantasy Art
Part 3

Tools and Materials

DIY metal frame 
Picture hanging wire (any wire will do, even tough string)
screwdriver
duster
matted artwork
plexiglass
wire cutter
Plexiglass

This is the final part of the tutorial.  Previously I had completed the matting of the art, and now I assemble the frame and put the artwork in it.  I buy my frames from American Frame, Graphic Dimensions, and sometimes from the art suppliers like Dick Blick, Pearl Paint, or AI Friedman.  I like American Frame because most of the time I'm framing artwork for conventions and I expect the art will do some traveling before it sells, so I prefer metal frames for toughness. I use plexiglass, which American Frame will cut for you as well, instead of glass because it is much lighter, and may crack but not shatter as glass will.  I like color in my mats but a clean, austere look in my frames.  


I assemble the frame as per the instructions, leaving the top open for insertion of the art.


I insert the corners at the top and the piece for hanging wire about 5" down.


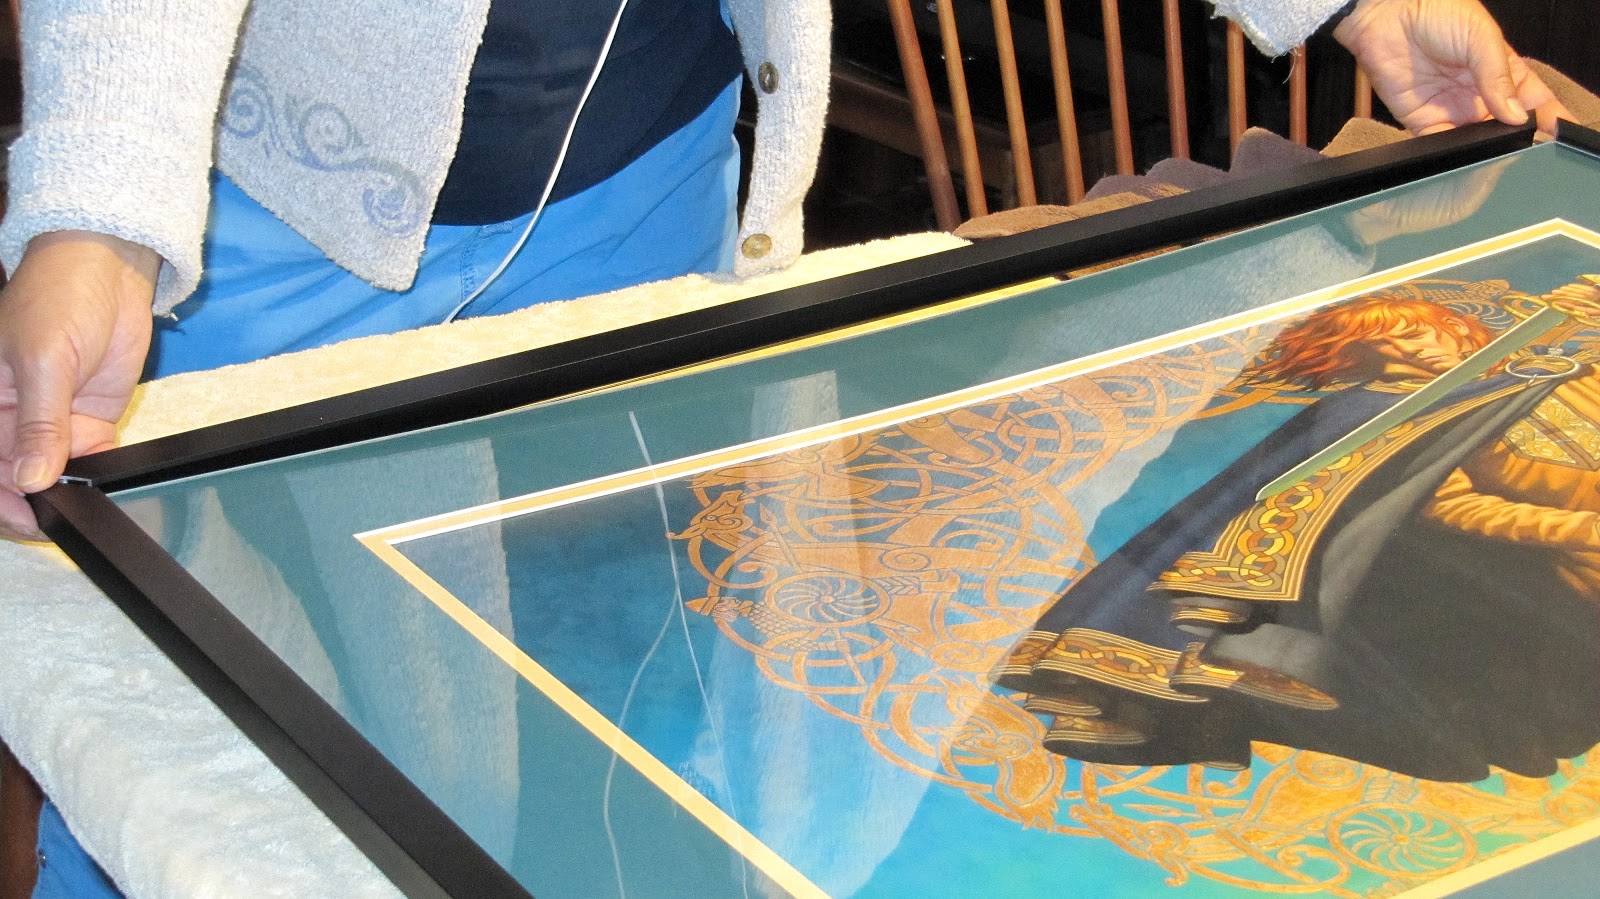
I dust off the top of the matted artwork so there is no lint.  The plexiglass comes with sticky paper on both sides. I peel off one side and place it quickly on the matted art so there is minimal chance of getting dust on that side.  Then I peel off the other side, revealing the artwork.  I scan for lint and specks.  If I find anything, I carefully lift the plexiglass and use a bit of masking tape on a finger to trap the lint and remove it.


 Now I'm ready to slip the matted artwork and plexiglass in together into the 3 sided frame.


And slip in the final top side of the frame.


I turn the whole piece over and screw the sections in tight.


I don't know the technical name for these curvy things, but they apply pressure between the frame and the backing board to keep the art in place.  Slip them in along the edges, about 4 or 5 to a side.


They don't fit in all the way, and they occasionally pot out, but they do the job.


 Cut a length of wire about 4" longer than the width of the frame and put them through the holes of the frame's wire hangers.  Wrap the ends around the wire.


Finished and ready for show!


Jody

www.astudiobythesea.com
www.jodylee.org

[Etsy+avatar.jpg]