Last year I made these really cute valentines envelopes, they were a huge hit with everyone. My sons teacher told me the other day how she has been using hers to store jewelry when she's travelling. I thought it would be fun to repost the tutorial in time for this years February the 14th.
Materials
- Felt pieces
- Embroidery thread and needle
- Button
- Iron-on printer sheet
- Ribbon
- Template (as photo below)
1) Write a list of all the names you would like on your envelopes and print them out onto iron-on printer paper. I used the font 'courier' to make it look like old-fashioned typewriter print. Remember to flip your page first before printing it so that the names come out the right way around. I did this my saving my word document as a PDF then opening it up in photoshop and flipping it before printing it out.
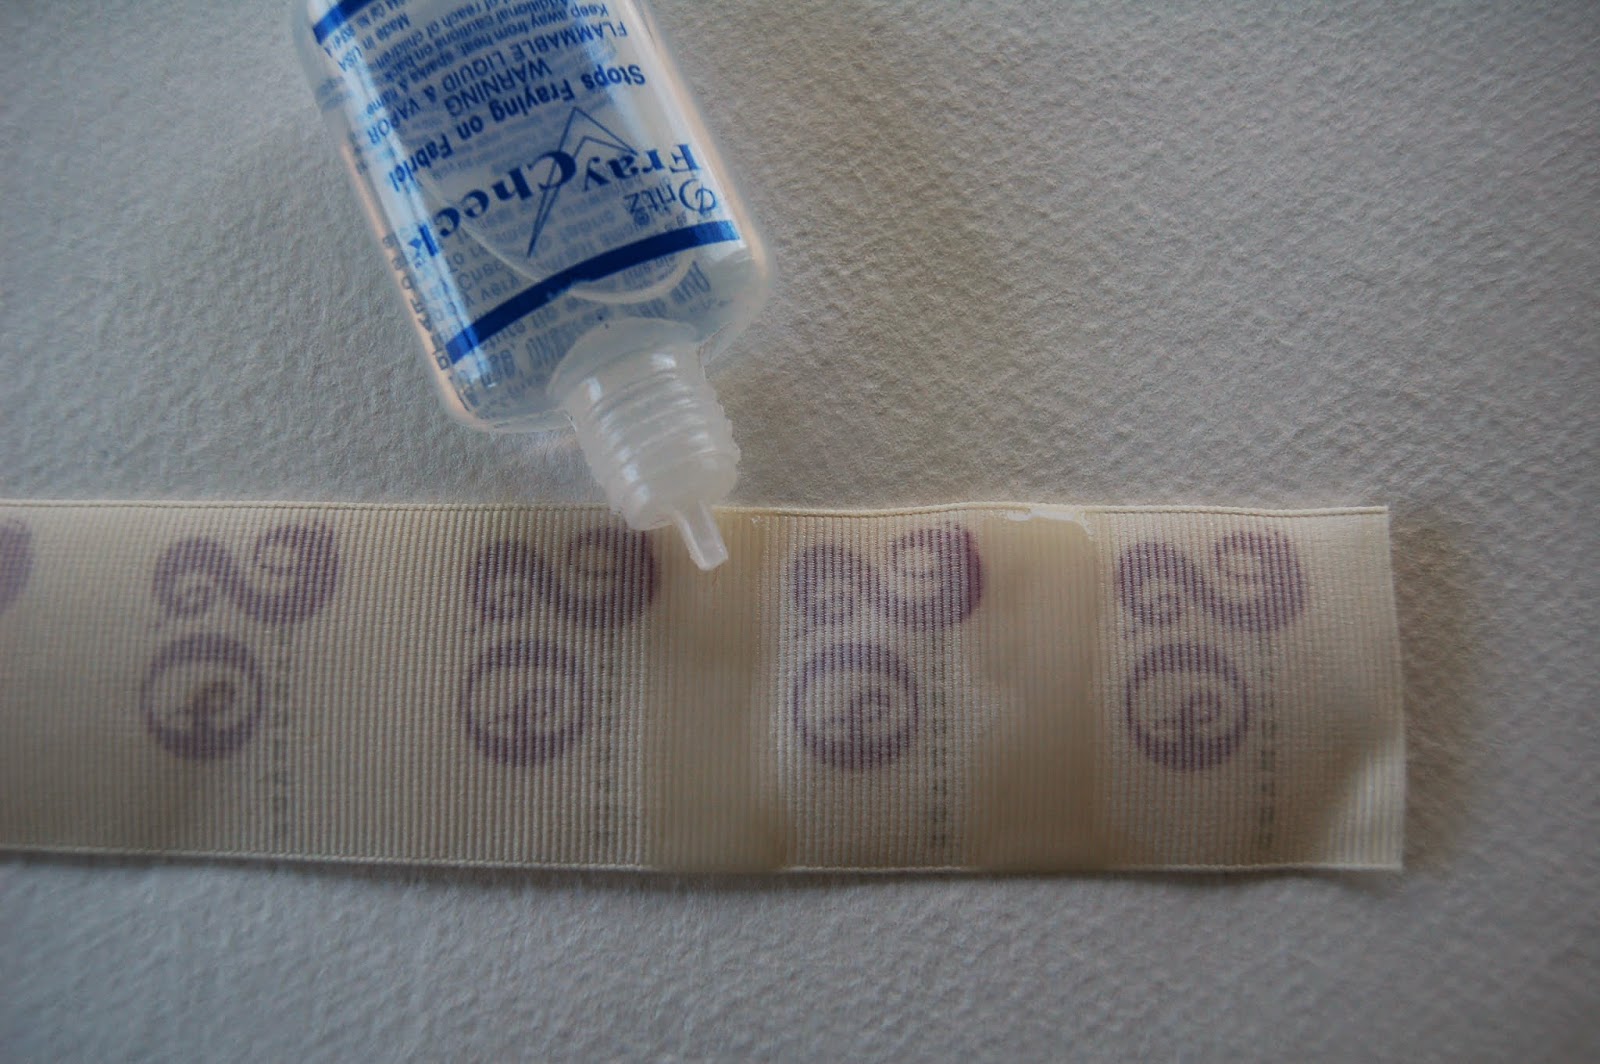
2) Cut out the names and iron them onto a grosgrain ribbon, cut the ribbon either side of the name leaving a small amount to turn under on both the open fraying sides.

3) Use your template to cut out your felt pieces, also cut out small felt hearts in coordinating colors.

4) Sew the hearts and the names on to the envelopes in the corresponding places (see photo below.) Tuck the raw edge of the ribbon under so that it won't fray.

5) Turn over the envelopes and sew the sides and the end down.

6) Sew a button on the back and cut a small eyelet in the flap.
7) Fill the envelop with a valentines card, gift, candy or a perfect Valentines day surprise.
All you need is love. But a little chocolate now and then doesn't hurt. Charles M Schultz
Good Luck and Good Making!
Sarah Omura
So Handmade
.JPG)