Showing posts with label Valentine's Day. Show all posts

Friday, February 13, 2015

Happy Valentine's Day!

We wanted to celebrate Valentine's Day a day early on the blog by sharing a couple of Valentine's theme Etsy treasuries featuring items from our members.  Have a wonderful weekend!


Wednesday, February 11, 2015

Valentine's Day: Free Printable

Happy Valentine's Day
from the 
Hudson Valley Etsy Team


Print out borderless on 8.5x11" card stock, makes two per sheet, use invitation envelopes 4.57x5.75" 


Visit our VALENTINE'S DAY GIFT GUIDE for more great gift ideas!
Jody


Wednesday, January 28, 2015

Valentine's Day Gift Guide - Hudson Valley Etsy

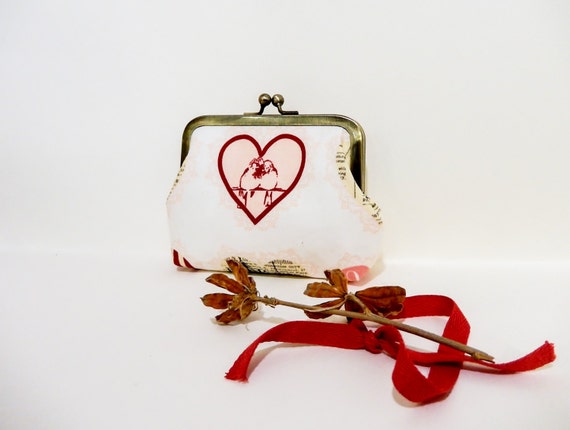
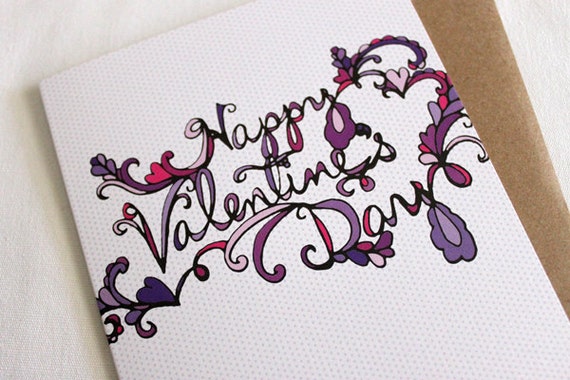
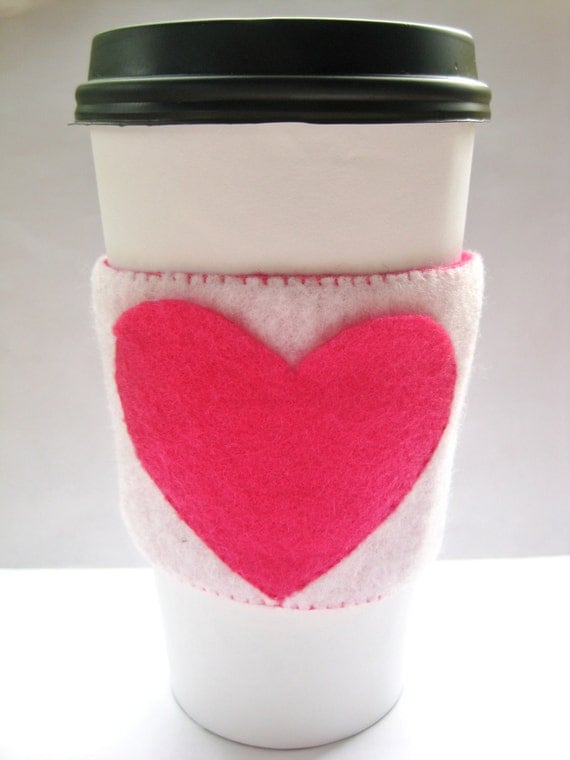
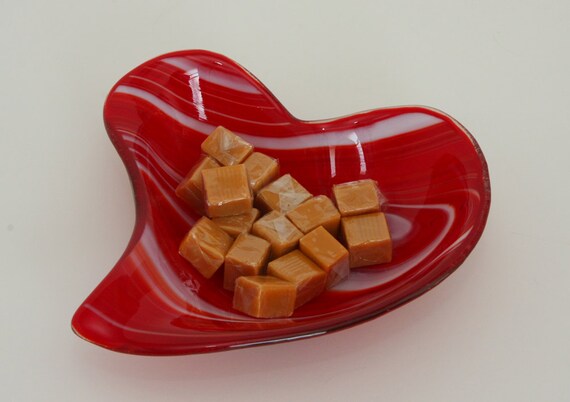
If you are not following us on Facebook (why not??), then you missed this year's collection of Valentine's Day gift ideas from the Hudson Valley Etsy Team.  That's ok, we got you covered here to help you shop local.  See our complete list on Etsy here.  Click the image to view the listing in our members' Etsy shops.

Clutch from Hand J Star Creations
Valentine's Day Card from Cynla
Valentine Pocket Coffee Cozy from Quarter Life Luck

Heart Shape Swirl Glass Dish from Get Glassy
Hope you like our picks! You can always see more gift idea options on our Etsy page.

Wednesday, January 21, 2015

In my Studio: Valentines Envelope Tutorial


Last year I made these really cute valentines envelopes, they were a huge hit with everyone. My sons teacher told me the other day how she has been using hers to store jewelry when she's travelling. I thought it would be fun to repost the tutorial in time for this years February the 14th.

Materials
  • Felt pieces
  • Embroidery thread and needle
  • Button
  • Iron-on printer sheet
  • Ribbon
  • Template (as photo below)

1) Write a list of all the names you would like on your envelopes and print them out onto iron-on printer paper. I used the font 'courier' to make it look like old-fashioned typewriter print. Remember to flip your page first before printing it so that the names come out the right way around. I did this my saving my word document as a PDF then opening it up in photoshop and flipping it before printing it out.


2) Cut out the names and iron them onto a grosgrain ribbon, cut the ribbon either side of the name leaving a small amount to turn under on both the open fraying sides.


3) Use your template to cut out your felt pieces, also cut out small felt hearts in coordinating colors.


4) Sew the hearts and the names on to the envelopes in the corresponding places (see photo below.) Tuck the raw edge of the ribbon under so that it won't fray.


5) Turn over the envelopes and sew the sides and the end down.


6) Sew a button on the back and cut a small eyelet in the flap.

7) Fill the envelop with a valentines card, gift, candy or a perfect Valentines day surprise.


All you need is love. But a little chocolate now and then doesn't hurt. Charles M Schultz


Good Luck and Good Making!

Sarah Omura
So Handmade

Tuesday, February 4, 2014

In My Studio: Valentine Envelope Tutorial


In my studio this month I have been making these really cute valentines envelopes, they can be done any size you like and can hold a valentines card, gift or even candies. Here is a tutorial to make your own in time for February the 14th:

Materials
  • Felt pieces
  • Embroidery thread and needle
  • Button
  • Iron-on printer sheet
  • Ribbon
  • Template (as photo below)
1) Write a list of all the names you would like on your envelopes and print them out onto iron-on printer paper. I used the font 'courier' to make it look like old-fashioned typewriter print. Remember to flip your page first before printing it so that the names come out the right way around. I did this my saving my word document as a PDF then opening it up in photoshop and flipping it before printing it out.


2) Cut out the names and iron them onto a grosgrain ribbon, cut the ribbon either side of the name leaving a small amount to turn under on both the open fraying sides.


3) Use your template to cut out your felt pieces, also cut out small felt hearts in coordinating colors.


4) Sew the hearts and the names on to the envelopes in the corresponding places (see photo below.) Tuck the raw edge of the ribbon under so that it won't fray.


5) Turn over the envelopes and sew the sides and the end down.


6) Sew a button on the back and cut a small eyelet in the flap.

7) Fill the envelop with a valentines card, gift, candy or a perfect Valentines day surprise.

All you need is love. But a little chocolate now and then doesn't hurt.

Read more at http://www.brainyquote.com/quotes/quotes/c/charlesms189865.html#uH2UkkAybvyPpcqc.99
All you need is love. But a little chocolate now and then doesn't hurt.

Read more at http://www.brainyquote.com/quotes/quotes/c/charlesms189865.html#uH2UkkAybvyPpcqc.99

All you need is love. But a little chocolate now and then doesn't hurt. Charles M Schultz

Good Luck and Good Making!
Sarah Omura
So Handmade

Tuesday, January 29, 2013

Tutorial: Candle Holder Vellum Heart Decoration

Here is a tutorial to decorate any glass candle holder with paper! A great, inexpensive way to create candle holders to fit any occasion. This design is a simple, elegant Valentine theme, using vellum and cut paper.  
Materials:
1. Paper. I used white vellum, red vellum, and black paper. The translucent vellum is what diffuses the light and creates a nice glow. Black or dark paper will give you a nice crisp silhouette against the light, a light colored or thinner paper will give you a more muted look.
2. Clear Glass candle holder.
3. X-acto knife with #11 blades, or small scissors.
4. Self-healing mat or cardboard to cut on.
5. Ruler for cutting straight lines.
6. Double sided tape or glue.
7. Votive candle or battery operated tea light.

You can refer to my tutorial for Cut Paper Silhouettes for ideas on finding a design and transferring it to paper: Paper Cutting Tutorial   Measure the height of your candle holder, and cut a strip of vellum to wrap all the way around it. Size your design to fit within this space. My heart design has the main heart image in front, and swirls that partially wrap around the side. You can choose a design or pattern that wraps all the way around also.   Transfer your design onto the paper. Cut the design out with your x-acto knife, on your self-healing mat. Make slow, small cuts, and make sure your blade is sharp.  

  Once your main design is cut out, you can add other colors. I added red to the center of the heart by tracing the space cut out of the heart onto red vellum. Make the shape slightly larger than the opening you are tracing so that it will overlap. Then I cut out the red vellum heart, and attached it to the back of the black paper. Vellum is harder to cut shapes out of, it helps if you hold the paper down close to where you are cutting so it doesn’t tear. You can also try small scissors.   Attach the colored vellum to the back of the paper with double-sided tape or small amounts of glue. Attach the whole design to the long strip of vellum with double-sided tape or glue. Tape is better than most glue because it will be a little more flexible when you bend it around the glass. You can also use a spray adhesive. Wrap the vellum around the candle holder and secure at the back with tape. Light a candle inside, turn down the lights, and enjoy! You can use a regular candle with this since the paper is on the outside, just make sure the paper doesn’t go higher than the glass, and never leave a burning candle unattended.  
  Extra Tip: To remove wax from a used glass candle holder, use boiling water. Make sure the glass is not too cold to start with (or it could crack), place it in an aluminum pie plate to catch any water or wax, and fill the glass with the boiling water. Let it sit for a while and the wax will melt and float to the surface. Pour some boiling water down the outside also to melt it away.

Arwen ~ Arwen Designs

Friday, January 20, 2012

Save $ with the HV Etsy Team

Did you know that members of our team offer discount codes with their Etsy shops?   Why not give yourself an early Valentine's Day gift from one of these shops.


Milestone Decal Art is having a Valentine's Day Sale! 2/1 through 2/9. Free Shipping on all continental US orders. Use coupon code LOVE at checkout.


LOVE20 for 20% off storewide at Tinks Treasure


BEMINE for 15% off any item from Meerwiibli.etsy.com


Good until the end of January only, Sweet Olive Supplies is offering 10% off with the code NEWYEAR10


Pulp Sushi is offering 20% off using code "LOVEU20" at checkout now through February 17th

Monday, January 31, 2011

Coco Delay Chalkboard Jewelry


You can find a lot of unique gifts for Valentine's Day while looking through the Hudson Valley Etsy Team shops. One of our sellers, Coco Delay had her popular Chalk Board necklace featured on Cupid's Pulse recently. Congratulations on the feature Marti!