Monday, February 11, 2013

In My Studio: Time Saving Tips


The other day I was in my studio sewing on my machine.  After taking the fabric off I realized I had sewed the wrong sides together; I would have to unpick the whole thing. I was so cross with myself, how could I have done something soooo stupid! What a waste of time! Yes, that's the crux of the issue TIME.
As a Mom of a very active 3 year old boy I don't get much time to devote to my business. The time I do get is therefore very precious and I hate wasting time knowing that the sound of little feet will come along any minute to put an end to my industry. Don't get me wrong I love my family very much but getting that work/life balance right is so hard and in my case, ultimately, work is always on the losing side.
With this in mind when I am not making mistakes on my sewing machine here are some of the ways I manage to save time:

1.    I try and keep my studio organized and tidy, it saves time looking for things and cuts down on accidents.


2.    I stow any products that need to be hand sewn in a basket, together with the needle, thread, and scissors. I bring this out at night and sew in front of the TV.


3.    Similarly, I collect together anything that needs ironing in a pile and do it all at once in the evening in front of my favorite show.

4.    I bring a flask of tea and a bottle of water into the studio with me in the morning to cut down the trips to the kitchen for refills.

5.    I make a quantity of products at the same time, cutting them all out at the same time, then making them up stage by stage until all of them are completed.


6.    I throw ingredients into a crock pot early in the morning then dinner will be ready on demand and the extra stress of preparing dinner has been taken away.


7.    I try and go shopping for supplies in the evenings or weekends when my partner is home to babysit, therefore freeing up those precious weekday/daytime making hours.


8.    Similarly, I try and do a couple of hours of paperwork/computer work at the weekend when my partner can take the little one out. The accounts always get forgotten and doing a couple of hours a week saves me loads of time later on.


9.    In order to stay on top of things I always keep lots of lists; lists of supplies to buy, lists of outstanding orders, lists of events to plan for, then when the opportunity arises I can plunge right in.


10.  I never try and do any work when my family are home,  the distractions are just too stressful and I end up making mistakes that set me back even further. Close the studio door!


11.  Having said that, when things get busy I sometimes utilize my partner to help with packing and postage.

Good luck and good making!

by Sarah Omura, SO Handmade

Friday, February 8, 2013

Where To Find The Hudson Valley Etsy Team

Today we're introducing another two shops featuring the work of Hudson Valley Etsy Team members.

Family Traditions in Stone Ridge is a lovely shop, art gallery, and space for dispute resolution and educational services center at 3853 Main Street at the Stone Ridge Towne Center and you can find Gemini River Rocks and Knot by Gran'ma's creations there.
Gemini River Rocks
Gemini River Rocks

Knot by Gran'ma
Knot by Gran'ma

The Byrdcliffe Shop in Woodstock is the retail extension of the Woodstock Byrdcliffe Guild and features the work of many wonderful artists and artisans. It is located in the heart of Woodstock at 34 Tinker Street. Cerulean Blue, Karmabee and New Prospect Pottery's work is available at the shop.

Cerulean Blue
Cerulean Blue

Karmabee
Karmabee

New Prospect Pottery
Happy shopping!

Thursday, February 7, 2013

Meet Our Newest Blogger: So Handmade

Back in November you met the team's bloggers. Today we introduce latest contributor to the blog - Sarah from So Handmade!  Sarah started a new feature In My Studio. Her first post was last month: In My Studio: Organizing

SO handmade is a local arts and crafts business producing unique merchandise which combines mixed media with sewing and painting in a whimsical style.

SO handmade is run by Sarah Omura who lives in Connelly, NY with her husband and young son. Sarah is British and attended Loughborough College of Art and Design in the UK before moving to London to work with renowned interior decorator Nina Campbell. Sarah designed furnishing fabrics and wallpapers for the Nina Campbell brand- distributed by Osborne and Little for 6 years until 2004.
Sarah then embarked on a 6 year stint volunteering in Namibia in Southern Africa where she worked with local communities to design and develop products for the burgeoning tourism industry. The colors, fabrics and crafts she worked with in Africa has greatly inspired much of her work today

In setting up SO handmade Sarah wanted to explore a mixture of media combining fabrics, recycled materials and textures with a variety of different paints to achieve the finished pieces.


Tuesday, February 5, 2013

Creating Success from the Inside Out - 5 Money Traps to Avoid When Pricing Your Work

I was inspired this week to talk about setting prices for our work after participating in a webinar about money blocks, given by the Lucky Bitch, Denise Duffield-Thomas.  It got me to thinking about what money traps we artists on Etsy may fall into as a result of our own money blocks.

1. Setting your prices at wholesale level in a retail environment

I have gone through several iterations of pricing formulas and read lots of articles to figure out the best way to price my work.  The conclusion I reached was that I need to price my products so that I can sell wholesale, establish pricing consistency no matter where a customer might find my product, and still make a profit.  If I sell a pair of earrings for $40.00 on Etsy, then wholesale buyers will need to buy those earrings from me for 50% of that price, at most, so that they can sell those earrings in their shop for $40.00 and still make a profit.  This also means that I need to price my products so that when I sell my earrings to a wholesale buyer for $20.00 I am still making a profit.  If you are thinking to yourself, “I don’t sell wholesale, so I can set my retail prices lower”, I ask you to reconsider this as you read the rest of this post.  I believe this thinking is potentially damaging to your wellbeing as an artist.

2.       Not paying yourself for labor

If you’re like me, you love every minute of creating your handmade items, so it doesn’t often feel like work.  However, there are two points to consider here.  The first is if you want to scale your business up and potentially hire a person to help you in the future, then you need to build labor rates into your product prices.  If you don’t charge yourself for labor now and then you find yourself hiring someone later (whether it’s a person to help you bead, sew, knit, balance your account, or ship product), you will have to recalculate all of your prices at that point, which could affect an established customer base.  More importantly, your time has value.  Your skill has value.  You should get paid for that time and that skill.  And I don’t mean $3.00 an hour!


3.       Assuming that YOU are your customer

I fall into this trap all the time!  As artists, we may not have an income level that matches that of our customer.  It certainly depends on your market, but it’s important to avoid pricing your items according to what YOU can afford.  You may have an item that, when you calculate the price, you think, “Oh, no one will buy that at this price!” If you are assigning an appropriate value to your items then the customers who love what you offer and see the value in the product will be happy and willing buyers.  If you sell the item for less than what it is worth, then you are in danger of devaluing yourself as an artist. 

Another aspect to this trap is that we spend so much time with our products that sometimes we can grow too close to them to assign an appropriate value.  Familiarity can cheapen the value of the item, in our own eyes.  Try to look objectively at your work.  Put each item on a pedestal and adore it!  That customer who has been hunting for just the right thing will adore it, too, when they find it in your shop.  And they will pay money for it.

4.       Looking at what your competitors are charging and pricing your items accordingly

I believe that setting your prices according to your competition is detrimental to your wellbeing as an artist and a business owner.  When I browse products on Etsy, I’m amazed at how cheaply some sellers price their products.  It can be hard to offer an item for sale that is sometimes double what other sellers are offering for a similar product.  Don’t let other people’s money blocks dictate the cost of your items.   Come up with the formula that feels good to you, that helps you meet your business goals, and that reflects what you are worth as an artist.  You will be more at peace with yourself and happy doing the work because you know you are getting paid fairly for it. 

5.       Feeling guilty about asking for the true value of your work

I love lifestyle business guru Leonie Dawson who explains that there is a balance to the Universe in the exchange of goods and services for money and that when one person gets more value than the person on the other side of the transaction, it’s not healthy for either party.  That’s not to say that you can’t offer sales or promotions.  When you offer a promotion, you aren’t just selling your items more cheaply.  You are doing it for a reason; perhaps to create more buzz for your shop; to get more customers to sign up for your newsletter or blog; or for other non-monetary reasons that still have value to you as a business owner.

Do any of these money traps resonate with you?  How have you overcome them?  Are there other money traps we, as artists, should consider?

Sunday, February 3, 2013

February featured member: L&M studio


Hudson Valley Etsy Team's February featured member shop is L&M studio, a collaboration between Meg and Lucie.  Congratulations, you two! 

Meg and Lucie still smiling after a long day of work

One extra cold day in late January, I went to L&M Studio in Catskill, NY, to meet Meg and Lucie.  When I told them they had been chosen and asked what they wanted me to do for their featured member blog post, Meg responded,“Lucie and I have been brainstorming, and think that what is most interesting about us is our process, not only the process of slip-casting, but also of how we are inspired and collaborate to create new designs.”  Rather than making them take their own pictures, I decided I’d head over to get a better idea of their process (as well as the artists themselves).  So, armed with my camera and a 4gb SD card, I went to see what this lovely Etsy shop was all about. 

The shelving is from Ikea and doubles as their craft fair display 

The entrance of their shop is set up as a small storefront, the front windows and shelves filled with bowls, planters, and birdhouses looking out at the passerby.  The rest of their space is a sizable and well-organized ceramics studio. 


I love how they use a chalkboard to keep track of projects

I had read a bit about Lucie and Meg in preparation for this meeting; how they had met at Byrdcliffe Artist Colony in Woodstock as artists-in-residence, kept in touch, and started helping one another out on their separate projects while giving their puppies play-dates before Lucie lost her studio to Hurricane Irene.  Then they decided to get a shared space and start L&M Studio as a collaborative venture.  So I was not at all surprised when two lovely and well-behaved dogs came up to the studio gate to greet me (the dogs are not allowed in the storefront to prevent breakage).

Sasha and Max by the fire

I found Lucie and Meg to be wonderful ladies, super friendly, and a pleasure to talk to.  We discussed everything from tea, pets, and family members to Etsy, art, and business.  It was incredibly informative and fun for me, so I hope I can share my experience with you as well.


When creating a new design, Meg and Lucie work collaboratively to make an original model that will be used to create a mold.  When I was there, they were working on a large pet urn made of wooden blocks with clay filling in any gaps and a large fruit bowl.  It was great to see how they work with one another, deciding when a new item is completed and working back and forth.  

Lucie working on a bog bowl prototype

They are great at helping one another out by taking over each other’s tasks when the other gets tired of a specific job and working out the best way to complete a project.   We also talked about how having another person there while working really helps you keep on-track, as opposed to when they had their studios at home and they would often do laundry or some other household task when they should have been creating. 


Once they've decided a prototype is complete, they set it up for casting.  First, they use clay to start setting up the separate sections of the mold.


Surround it in wooden coddles or metal sheeting to keep the plaster contained and smooth out the added clay to close any gaps in the plaster that might leak through.

Meg drilling the coddles together for the dog bowl, she recommends using square screws heads and bits.

Now it’s time to start pouring the molds! The plaster needs to be mixed for 3 minutes (it’s kept in a separate room because if some plaster got mixed into the clay it would be disastrous).


Then pour and/or flick it on to the prototypes.  This is when visitors are most likely to come in the shop according to Meg and Lucie, as they are covered in plaster and have to work quickly to make the molds before the plaster hardens, and therefore are completely unable to help any customers. 


As the plaster starts to harden, it goes through a heat cycle.  I was told that the day before my visit, Lucie and Meg had some of their pregnant friends come by to make casts of their bellies but they had to cool the plaster beforehand so that, when the plaster warmed up, it wouldn't get hot enough to hurt them (I can’t wait to see what they make with those molds!).  With the large fruit bowl, Meg works with the thickening plaster to create feet.  


While I was there, I got to check out several of the molds they've already finished for everything from birdhouses and cups to planters and even stools!  To create their slip casted creations, they fill up the molds with slip (a mixture of clay and water) and let them sit.  


After awhile, the plaster starts to remove moisture from the slip, causing it to dry around the outsides of the mold.  Once the walls have thickened enough, they pour out the remaining slip and let the mold sit upside down for awhile so the excess clay drips out rather than settling on the bottom.


After awhile, Lucie and Meg open up the molds and pull out the pieces and see what they’ve created.


They add any finishing touches, like the feet on the footed nesting bowls.


And their own personal stamp reading “l&m” (this might be one of my favorite touches).

when you order one of their items it comes wrapped in blue tissue paper with a similar wax-seal 

Smooth out any drips.


Their final steps include drying, firing, sanding, glazing, and firing again.  Oh, and putting in the plants! 


I didn't get to see any of that, but I did get to talk to them about it and take a couple more pictures.  Depending on the time of year and what they’re working on, they’ll run the large kiln more often but it tends to average out to once every two weeks.  So far they've run it about 100 times since opening back in 2011.


They make most of their own glazes using raw materials like copper, flux, and clay.  They do buy their red glazes however. 


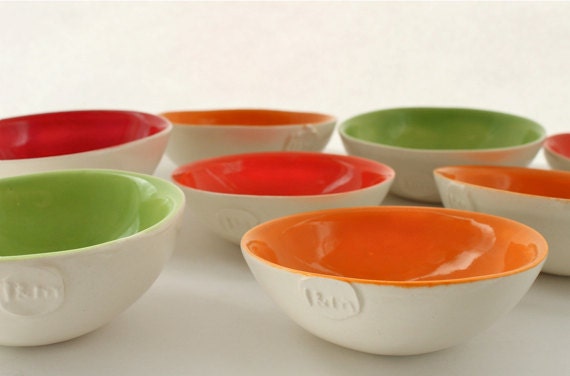
Meg and Lucie love the slip casting process even though, before opening L&M studio, they had only used it while at college.  Even though Lucie and Meg use molds, each item goes through their hands and, unlike in industrial slip casting, each item comes out a bit differently, giving each one a handmade one-of-a-kind feeling that’s part of what makes each of their creations so special. 

Vibrant Prep Bowl in Dark Orange

I hope you enjoyed your trip to L&M studio! I know I did.  Definitely go check them out in person if you can at 460 Main Street in Catskill.  Lucie and Meg are there most weekdays from 10-5pm, just be patient if they happen to be covered in plaster!  Or you can always check out their awesome Etsy shop.   I’m sure you know someone who needs one of their adorable birdhouses or bud-vases for Valentine’s Day! (Or is that just me?)

Enjoy!
Amber